Watermarks are intended to be positioned behind other text or a list of words in a document. A watermark could be a logo, an image, or text, and it can be as subtle or prominent on a document or photo as you’d like.
This article walks you through how you can create a custom watermark easily for your document or project.
There are two ways of adding a custom watermark to your document;
- Adding a Text Watermark
- Adding an Image Watermark
We used the 2021 version of MS Word for this article. Don’t worry if you have Microsoft 365, Word 2019, Word 2016, Word 2013, and Word 2010. It follows the same process.
How to watermark in Word
There are two ways;
Inserting a Text Watermark in MS Word
1. Open Your MS Word together with the document you want to edit
2. On the Design tab, select Watermark > Custom Watermark.

3. A pop menu will automatically open showing the preferences of the Watermark you want to add
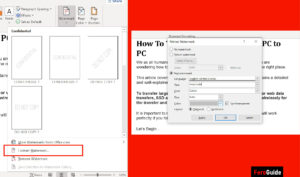
4. Select Text Watermark, then go ahead to type in the preferred name, font style, etc.
5. Click on Apply for the Watermark effects to apply

The watermark only appears in the document in the Print Layout view. If you don’t see the text watermark, go to the View tab and select the Print Layout option.
Inserting an Image Watermark in MS Word
1. Open Your MS Word together with the document you want to edit
2. On the Design tab, select Watermark > Custom Watermark.
3. Select Picture Watermark, then click on select picture.
The select Picture gives you two options, where you can browse the file(Picture) on the local hard storage or online.
4. Click on Apply after you have selected your preferred image.
Note: The washout option is use to blur the nature of the image

How to Remove Watermark from MS Word
In the open Word document,
- Click on the Design Tab
- Click on Watermark in the Page Background Category
- In the drop-down menu, Click on Remove Watermark.
The Watermark will remove automatically.
One comment
Comments are closed.