The iPhone has been notable for taking excellent pictures, making users feel happy whenever they get an iPhone to snap pictures.
Even though iPhones can snap excellent pictures, the user can make the picture taken stand out.
Whether you are a newbie or a regular iPhone user, this article will help you understand and know the best settings to take pictures. This article will walk you through how to take better pictures with iphone.
What to Know
- Remember that, Picture quality differs from iPhone to iPhone, So I strongly recommend users use iPhones from X to Latest.
- The iPhone used in this article is iPhone 13.
How To Take Good Pictures With iPhone
- Clean your iPhone lens
- Turn on your Grid
- Adjust and Lock your Focus and Exposure
- Try Portrait mode
- Editing Your pictures
Clean your iPhone lens

Since the iPhone lens is hardware and has been exposed to the environment, the probability of it getting dirt and picking other particles is high, so it is advisable to regularly clean the lens before taking pictures.
Sometimes pictures being taken might not be nice because the lens can not get a clear view to snap the picture.
Turn On your Grid
The next thing or tip to use is to turn on your grid, the importance of turning on the grid before taking pictures includes;
- Align subjects and composition
- Achieve balance and symmetry
- Avoiding crooked or uneven shots
Grids help photographers compose and capture more professional-looking images.
When you turn the grid on, it will appear on your screen and won’t show up in your images. The grid will display two vertical lines and two horizontal lines creating nine squares.
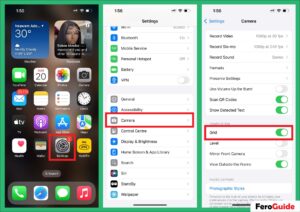
How To Turn Grid On iPhone Camera
To turn on grid for iPhone,
- Open Settings on iPhone
- Find and Click on Camera
- Toggle the Green icon closer to the grid to turn it on.
Adjust and Lock your Focus and Exposure
Focus
The importance of using focus for taking pictures can be drawing attention to the subject and separating the object from the background.
To ensure that the picture you want to take is in focus, open the camera and tap the phone screen where you want your iPhone camera to focus. A yellow box will appear indicating where the phone is focusing.
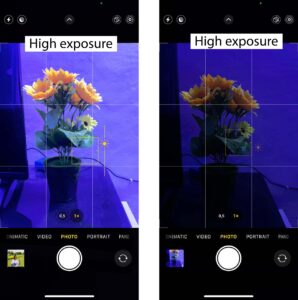
Exposure
After the focus icon has appeared on your phone screen, on the right-hand side, a yellow sunshine button will appear.
Pulling it down will make the brightness of the picture go down, so pulling it up will make the brightness go up.
![]()
NOTE: increasing the exposure too high will make the image blur, and decreasing the exposure will make the image dark.
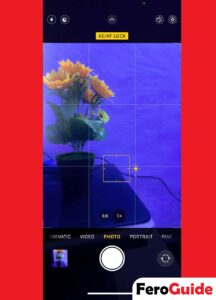
Lock your Focus and Exposure
Manually adjusting your focus and exposure is easy but sometimes can be annoying because you will need to redo it anytime you have to take a picture.
This is when locking focus and exposure come in. To do that,
- tap and hold your finger on the screen. You’ll see a yellow rectangular block called “AE/AF Lock” at the top of the screen, which means your focus will be locked while you take pictures.
- This will also hold the exposure as well unless you want to adjust it a bit by moving the sun icon up or down.
- To undo the locked focus, just tap the screen again and it will unlock.
Portrait mode
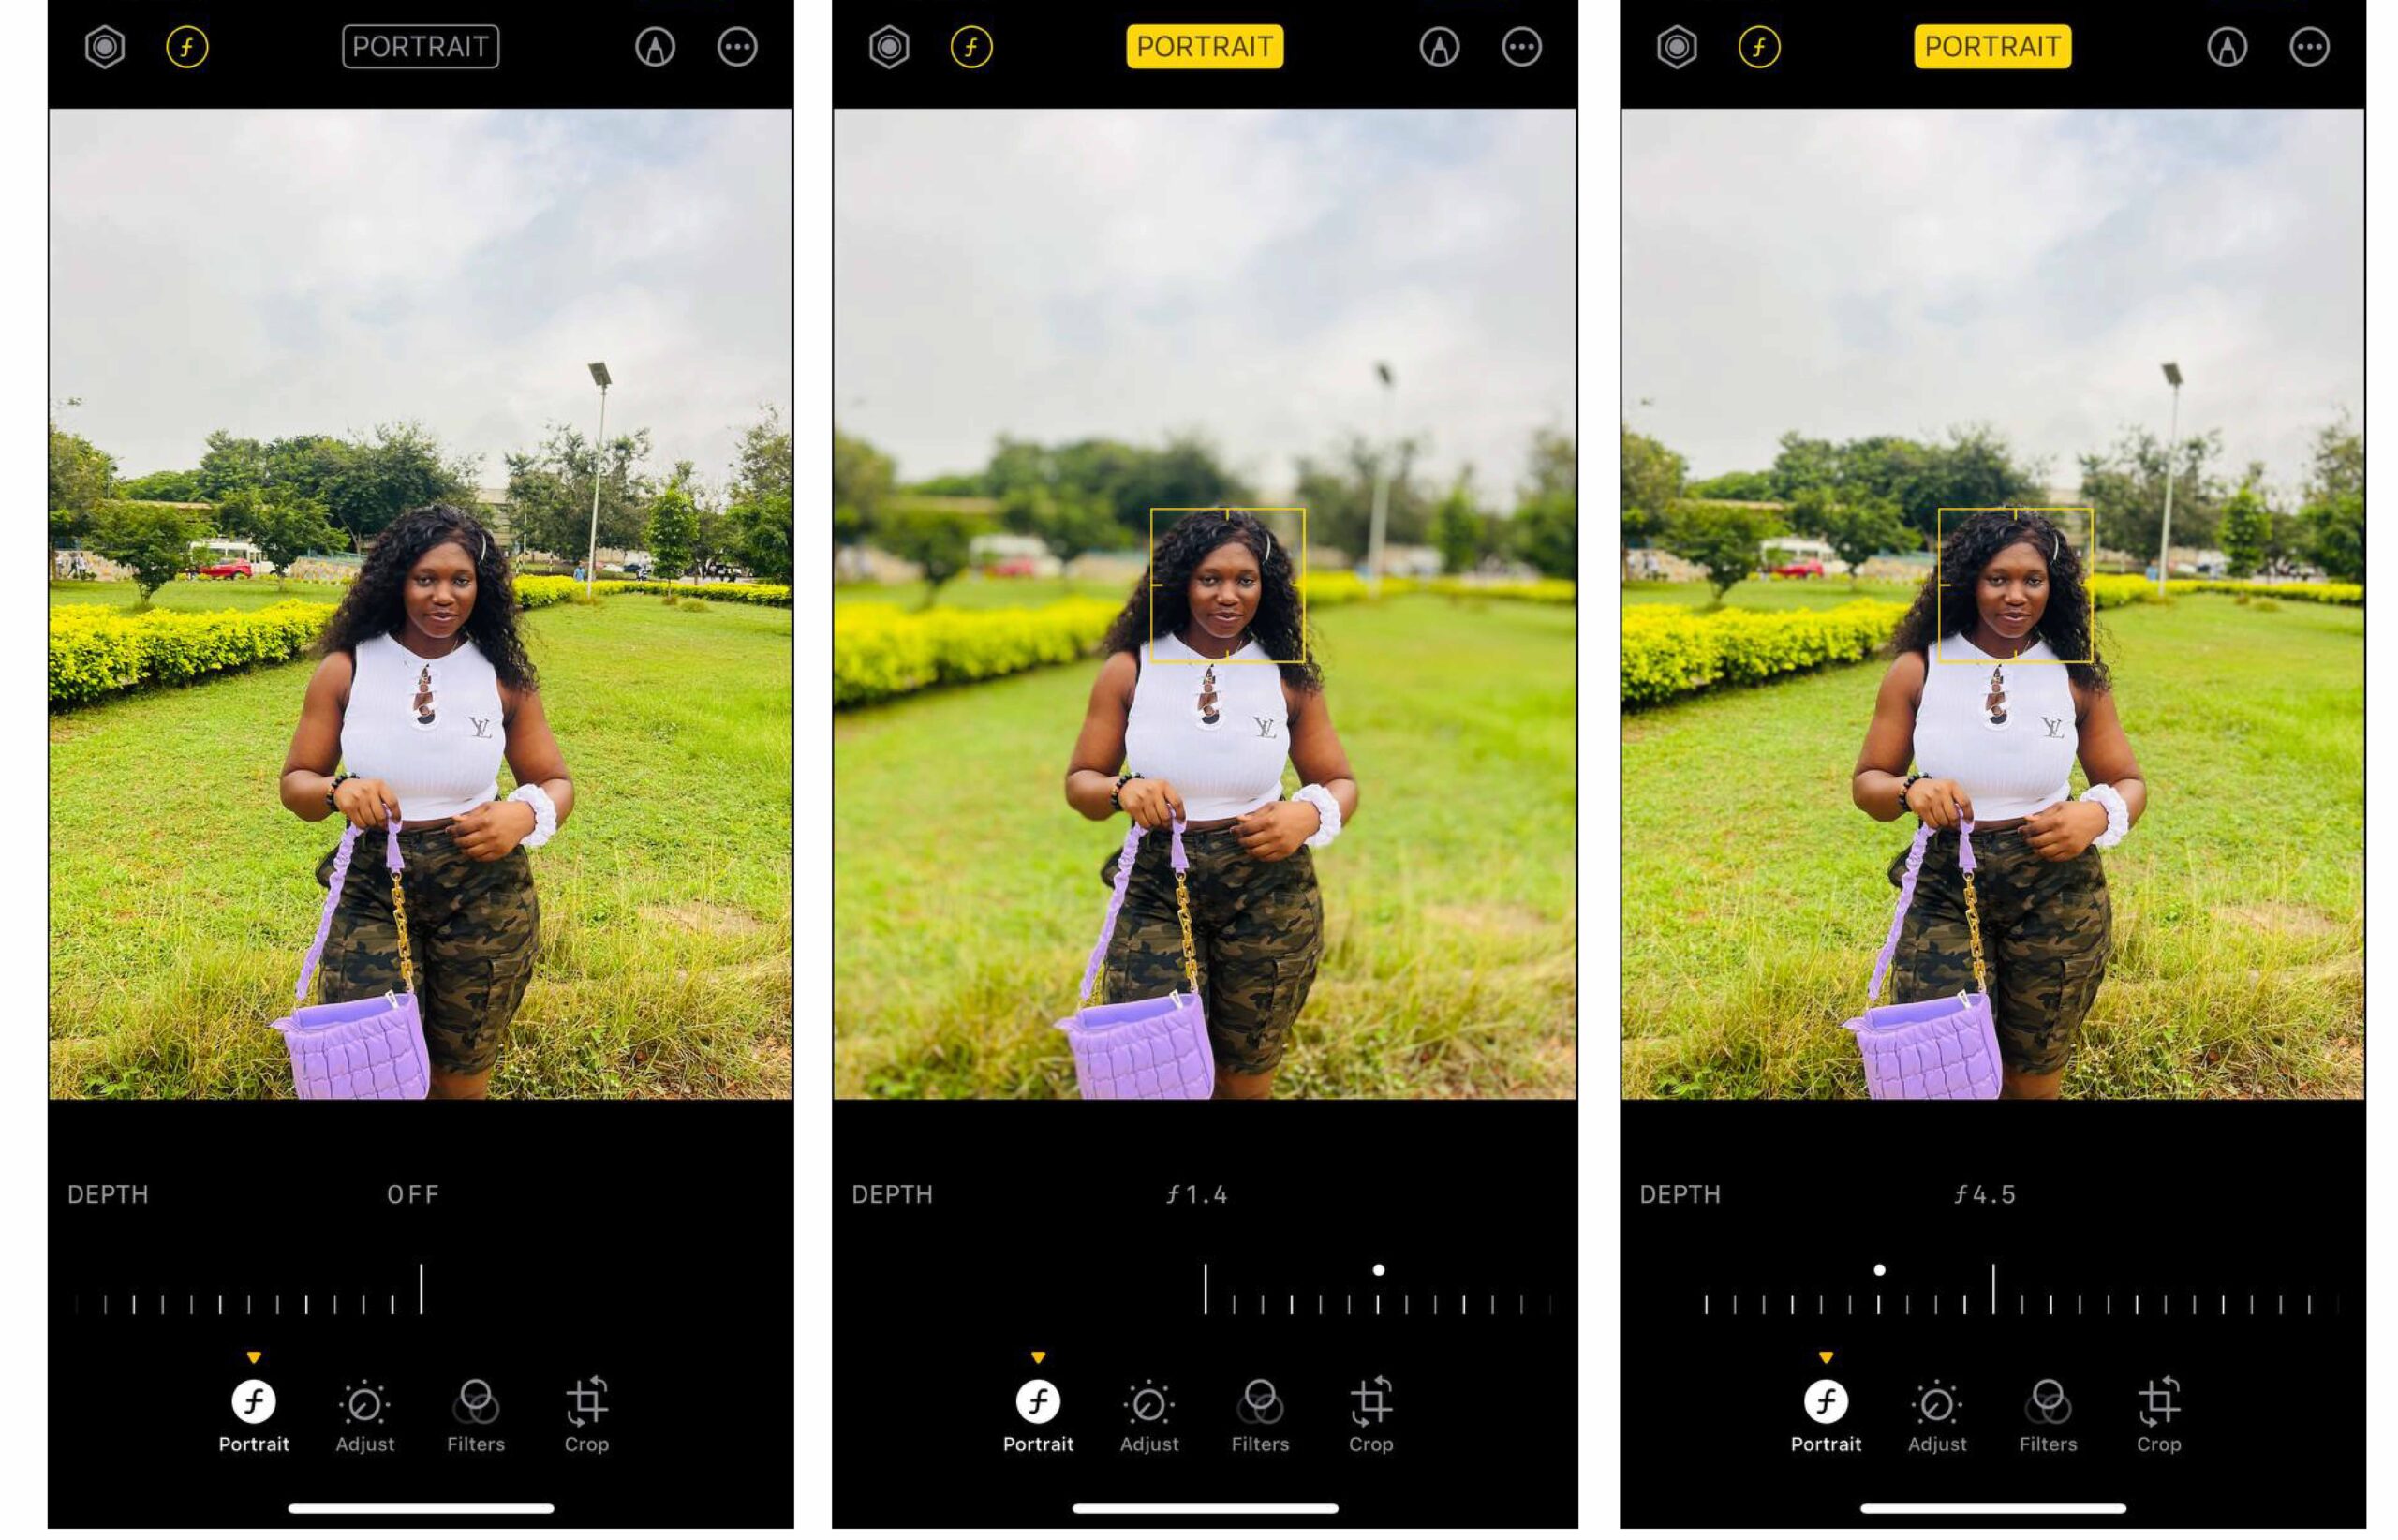
The portrait mode is fun to play with, it makes pictures stand out when being taken. The iPhone lens has a portrait mode ranging from f1.8 to f16. The lower the number, the more background blur you’ll see. The higher the number, the less background blur will be.
The best advice I can give is to make sure the mode is in between the middle (f4.5).
How To Adjust Portrait Mode on iPhone
follow these steps:
- Open the Camera and Select Portrait mode.
- Click the “f ” in the circle in the upper right corner.
- Use the slider beneath the image to adjust how high or low you want the blur to be.
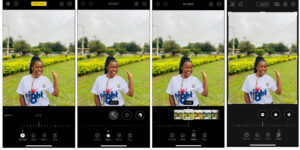
Editing Your pictures
![]() The last tip I will give is about editing pictures taken. Adding some filters and exposures to your pictures after being taken makes it stand out.
The last tip I will give is about editing pictures taken. Adding some filters and exposures to your pictures after being taken makes it stand out.
Even though some pictures come out beautifully adding some filters will make it better.
You can start experimenting with editing using the standard camera app on your iPhone. It has some basic editing features.
How To Edit Picture On iPhone
Open the image you want to edit, click Edit and you’ll get four icons sitting beneath your image.
Portrait Mode
As discussed already, the portrait mood helps you to add more or decrease the blur background of the image.
Adjust Mood
The adjust mood gives you 16 moods in which you can add natural colours to the image to make it brighter. If you are a newbie in photo editing, I will best recommend you to use the auto mood.
Filters Mood
The filter mood gives you 10 varieties of moods in which you can set your picture. The filter mood can either be done before or after taking pictures.
The common one I use before taking pictures is the VIVID mood.
Crop Mood
The crop mood can be done manually by pulling the edges of the crop box to cut off the unwanted parts of the images.
Alternatively, you can use straighten, vertical, or horizontal cropping which works perfectly.![]()
![]()
You can also check out our article on How to Pay Startimes Packages.