If you love having your nails done but don’t always have the time (or budget) to hit the salon, simple nail designs are the way to go.
The best part? You don’t need to be a pro nail artist to create stylish looks. With a few tools, some creativity, and your favorite polish shades, you can pull off trendy nail art that looks chic but effortless.
Below are 14 simple nail designs that are perfect for beginners, busy schedules, and anyone who wants cute nails without the fuss.
This article includes affiliate links. If you make a purchase through these links, I may earn a commission at no extra cost to you. I only endorse products or services that I personally use and believe will benefit my readers. Your support is highly appreciated.
Also Check: Engagement Nail Ideas For You
1. Classic French Tips
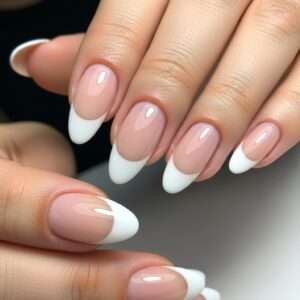
The French manicure is timeless. Swap the traditional white tips with soft pastel or metallic polish for a modern twist. It’s simple, classy, and matches every outfit.
How to do it:
Start with a nude or light pink polish as your base. Once it’s dry, use white polish to carefully paint the tips of your nails in a thin, curved line.
If freehand feels tricky, try French manicure stickers or tape to guide the shape. Seal with a clear top coat for a glossy finish.
2. Polka Dot Nails
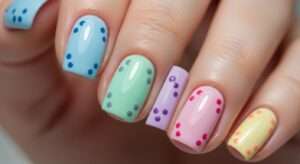
Grab a dotting tool (or even a toothpick), dip it in your polish, and make little dots over a solid base color.
Polka dots instantly add a playful touch without being too complicated.
How to do it:
Apply your favorite base color and let it dry. Use a dotting tool, toothpick, or the end of a bobby pin dipped in polish to add dots in a contrasting color.
Space them evenly or scatter them for a playful effect. Finish with a glossy top coat.
3. Minimalist Lines
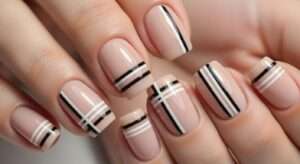
Use striping tape or a steady hand to draw thin lines across your nails. Vertical lines can make your nails look longer, while horizontal lines add an edgy vibe.
How to do it:
Paint your nails a solid color (nude or white works best). Once dry, use striping tape or a thin nail brush to draw simple straight lines—vertical, horizontal, or diagonal—using black, white, or metallic polish.
Remove tape while the polish is still wet for crisp lines.
4. Glitter Accent Nail
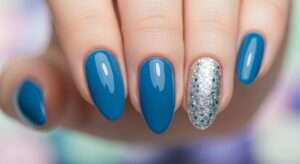
Paint all your nails in one color, then choose one finger (usually the ring finger) and coat it with glitter polish. It’s the easiest way to make your manicure pop.
How to do it:
Paint all your nails in a single shade. On your ring finger (or any nail you want as the accent), apply a glitter polish or loose glitter.
This creates a focal point without overwhelming the whole manicure. Seal with a top coat for sparkle that lasts.
5. Ombré Fade
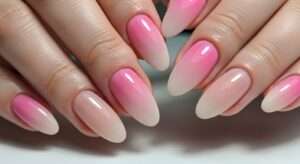
Blend two nail polish shades using a sponge to create a smooth gradient effect. Soft pink into nude or blue into white are beginner-friendly combos.
How to do it:
Paint a light color as your base coat. On a makeup sponge, apply two polish shades side by side (like pink and nude).
Dab the sponge lightly onto your nails until the colors blend into a smooth gradient. Repeat for intensity, then clean edges with a brush dipped in nail polish remover.
6. Marble Effect
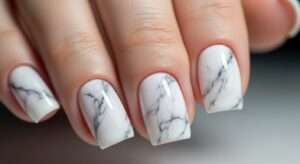
Swirl together white and gray (or any two shades) using a thin brush to mimic the look of marble. It looks intricate but is surprisingly easy.
How to do it:
Start with a white base coat. Using a thin brush or toothpick, swirl light gray or black polish gently over the white to mimic marble veins.
For a softer look, you can dip your brush in a bit of acetone before swirling. Finish with a glossy top coat to make it look like real stone.
7. Negative Space Nails
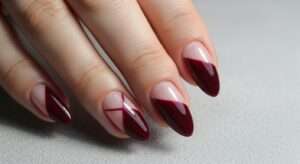
Leave parts of your nail bare while painting the rest. For example, paint half your nail diagonally and leave the other half natural. It’s chic and trendy.
How to do it:
Apply tape or stickers on areas of your nails you want to leave bare. Paint the exposed sections with your chosen polish color.
Once dry, carefully peel off the tape to reveal the clean “negative space.” Seal with a clear coat to blend the look.
8. Striped Tips
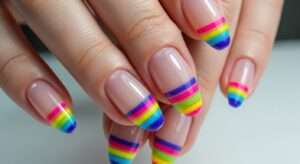
Instead of a solid French tip, add two or three thin colorful stripes at the tip of your nails. Perfect for a fun summer vibe.
How to do it:
Instead of the classic French tip, paint two or three thin colorful stripes along the tip of each nail. You can use nail art tape for cleaner edges.
Mix bright shades like pink, blue, and yellow for a fun summer vibe, or metallics for an elegant twist.
9. Heart Accents
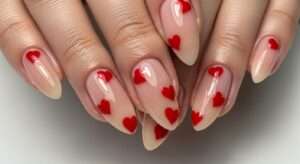
Draw tiny hearts on one or two nails using a dotting tool or nail stickers. This design is sweet, romantic, and simple to pull off.
How to do it:
Start with a nude or light pink base. Using a dotting tool, make two small dots side by side and drag them downward into a point to form a tiny heart.
Add hearts on one or two nails as accents. Seal with a top coat for a sweet, romantic look.
10. Floral Dots
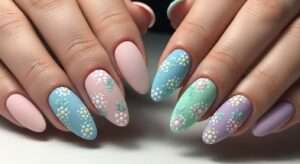
Make little flowers by clustering 5 dots in a circle with a different color in the middle. It’s an easy floral look that doesn’t require detailed painting.
How to do it:
Paint your nails a pastel base color. To make flowers, place five small dots in a circle with a dotting tool or toothpick, then add a contrasting dot in the center.
Repeat on a couple of nails for a spring-inspired design. Add a clear top coat to smooth it out.
11. Matte Finish
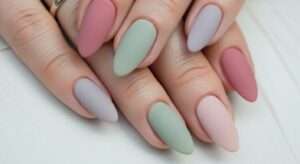
Switch up your look by using a matte top coat. Even the simplest single-color polish looks instantly elegant with a matte finish.
How to do it:
Paint your nails any solid color (deep red, black, or nude looks especially good).
Instead of a glossy top coat, use a matte one to instantly transform your nails into a chic, velvety finish. Bonus: matte hides small imperfections better than gloss!
12. Geometric Blocks
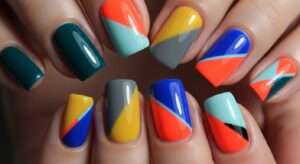
Paint your nail in two different colors split diagonally or vertically. Straightforward yet bold, especially with contrasting shades.
How to do it:
Use tape to section off half your nail diagonally or vertically. Paint one half with a bold shade and the other half with a contrasting color.
Carefully peel away the tape and finish with a clear coat. This design looks edgy yet effortless.
13. Sparkle Tips
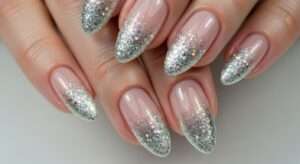
Instead of glitter on the whole nail, just brush some sparkly polish onto the tips for a subtle shimmer effect.
How to do it:
Paint your nails in your favorite base shade. Then, apply glitter polish only to the tips—either by brushing it on directly or dabbing with a sponge for more concentration.
This creates a subtle but glamorous look.
14. Nude with Gold Foil
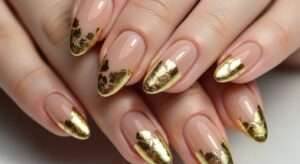
Apply a nude polish and add tiny pieces of gold foil or metallic stickers. It looks chic, expensive, and takes almost no effort.
How to do it:
Apply a nude polish as your base. Once dry, place tiny pieces of gold foil or metallic stickers onto your nails using tweezers.
Gently press them down, then apply a clear top coat to secure the foil and give it a smooth finish. This look is chic and high-end with minimal effort.
Final Thoughts
You don’t need hours at the salon to enjoy trendy nails. These 14 simple nail designs are proof that with a few polishes and a little creativity, you can achieve gorgeous results right at home.
Whether you love classy, playful, or bold looks, there’s a design here that matches your vibe.
✨ Pro tip: Always finish your designs with a good top coat to make them last longer and shine brighter.
Affiliate Disclosure: As an Amazon Associate, I earn from qualifying purchases. This post may contain affiliate links. This means I may earn a small commission at no extra cost to you.
